All kinds of dimmers produced by the industry are able to expand the functionality of almost any lighting fixtures, increase their efficiency. But if the situation is not typical, for example, if small sizes are important, then only a home-made device can help.
In addition, manufacturing can be a cheaper option than buying, which is extremely convincing. We will tell you how to assemble a dimmer with your own hands. The article presented by us sets out in detail what components are required, in what sequence to perform work.
When is a worst case purchase?
Factory brightness controls are able to provide the expected economic result or increase the comfort of living in all typical situations. In addition, their cost is different, which will make the purchase "affordable".
But still, in some situations, you can not find a suitable size or power option, so homework can be the way out.

In most cases, an interested person will be able to purchase an inexpensive factory dimmer, the working qualities of which will satisfy him
There are non-standard situations when industrial products do not satisfy human needs. For example, this happens if a small dimmer is needed, there is a desire to improve the aesthetic properties of its control panel.
Or a person considers it necessary to increase profitability, make management more convenient, achieve any color effects, improve any other characteristic.

Making the simplest dimmer is a simple task, all the more you will only need tools available to everyone, the main one of which is a soldering iron
And you can also perform the assembly yourself when you have the necessary components, which will significantly reduce the cost of the procedure.
What you need to know about dimmers?
The verb "to dim" in English means "become dull," "darken." This phenomenon is the essence of dimmers. In addition, a person additionally receives a number of advantages.
Pros of using the device
Among the advantages should be highlighted such additional features:
- reduce energy consumption - this leads to greater efficiency;
- replace several types of lighting fixtures - for example, one lamp can perform the functions of a night lamp, main lighting, etc.
In addition, the user can get various lighting effects, for example, use conventional lighting under the control of a dimmer as a light music.
And also its functionality allows you to work together with security systems or simply simulate the presence of people in the room. That will help the owners of any premises to protect their property from intruders or even prevent their unauthorized entry into the apartment, office.

The basis of the design of the dimmer is a triac. It is important to remember that its capacity should be 20-50% higher than the same load indicator. In addition, it must withstand a voltage of 400 V. This will ensure the product durability
Additionally, the brightness control is able to make the control of light sources, other electrical appliances more convenient, efficient. For example, you can use radio or infrared signals, which will allow you to perform the necessary manipulations remotely.
Or it is possible to use several control points of the lighting device instead of one. For example, if the user wants to make the lighting in the bedroom more modern, then the regulators can be installed at the entrance there, as well as near the bed.
Such a decision will make the life of the owners somewhat more comfortable. You can do the same in any other room.
How is regulation done?
If an interested person decided to assemble a dimmer on their own, then the procedure should not be started with thought about how to do this, but with the definition of goals and tasks that will be solved.

This is what an ordinary sinusoid of current looks like, and the essence of dimming is to “cut” it. This will reduce the duration of the pulse and allow the appliance to work not at full power
So before proceeding with the assembly, it is necessary to determine what type of lamps will be used. This procedure is mandatory, because there are various principles for controlling the brightness of the glow.
These include:
- voltage change - this method will be relevant when using obsolete incandescent bulbs;
- pulse width modulation - This option must be used to control the brightness of modern energy-saving lighting devices.
Changing the voltage of LED lamps is ineffective due to the fact that they work in a narrow range and with a small deviation from the norm, they simply go out or do not turn on. That will not allow to fully reveal the potential of conventional devices, because they produce specialized dimmers for LED devices.
In addition, the use of simple, but outdated rheostats does not provide an opportunity to save on electricity. After all, excess electricity in the form of heat simply dissipates in the air.

A correctly made dimmer should provide just such a sinusoid, in which short pulses alternate with long pauses. Moreover, the longer it is, and the signal strength is less, the dimmer the lamp will glow
With the help of pulse-width modulation, it will be possible to assemble a dimmer that provides the lamps with the ability to operate at 10-100% of their power. In this case, the user will receive a pleasant bonus in the form of energy saved.
And you can also fully use all the other advantages of dimmers, including durability.
The relative simplicity of the design
Despite the fact that household brightness controls allow you to get a noticeable visual and economic effect, they differ in a simple device.
That provides a long service life, and in the case when a person decided to perform an independent assembly, then the simplicity of this operation. As a result, almost anyone can cope with it, without even having special knowledge.

Home-made dimmer can be used in different fields, but it should be borne in mind that its manufacture on one component soldering will not end. Since homemade need to give an attractive appearance
So, the most popular modern dimmers are based on just a few elements:
- dynistor, his other name is often found - diac;
- triac, in another way - a triac;
- pulse forming unit.
In addition, the design requires the presence of several minor parts, without which work is impossible. These include capacitors, resistors (DC, AC). Each of the main listed semiconductor devices perform their part of the lamp brightness control.
The triac is often compared with a door for electricity, and in which you can enter on both sides. That is, it is possible to pass current to the lamps in an unlimited volume, but if necessary, and return its excess back.

This figure is a simplified dimmer circuit. Which indicates that there may be various features, but the triac will still remain the main regulatory element.
Such a process provides an anode with a cathode. They change places depending on the direction of movement of electricity. In addition, a multilayer conductor structure is provided, which allows you to perform tasks as accurately as possible.
The direction switching itself is performed by a dinistor, which is a bi-directional diode.
Scheme complication factors
A person who wants to assemble a dimmer on their own should think not only about acquiring the necessary semiconductors. Since the design will have to provide the ability to perform control, placement and even give sufficient aesthetic properties, a number of points have to be taken into account.
These include:
- type of management;
- method of placement;
- appearance.
Since the listed items significantly affect the performance of the dimmer, each of them should be dealt with separately. That will allow you to cope with the work efficiently.
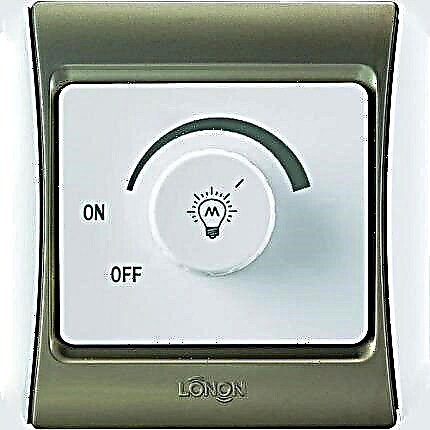
Existing instrument controls
Since you need to control the dimmer, a person should choose the best option. Because there are many of them and each has its own characteristics, advantages and disadvantages. This will significantly affect the design.
Manipulations can be performed by any of the following methods:
- mechanical;
- electronic;
- remote.
But most often for the various home-made dimmers, the first option is used. Since mechanical control is the simplest to assemble, and when you purchase components you will have to pay the least.

The dimmer circuit provides an opportunity to understand how it works. Namely, when a current appears in the network, it, passing through the resistors and one of the built-in diodes, charges the capacitor. Excessive voltage from which falls on the dinistor and triac. The load transmitted to the lamps depends on its position
In this case, the person will need only a regulator, which can be a rotary lever. If desired, it can be replaced by a pressure element. In this case, all manipulations will be performed by ordinary keys, familiar from traditional switches.
Often used combined rotary-push devices. They enable the on / off operation to be performed with the keys, and the adjustment itself with the rotary lever. What many users find convenient.
Any of these options in size and appearance may be similar to a conventional switch, which will replace such a device. This is another advantage. Electronic control involves the use of sensors to perform all the necessary manipulations. They are also in the form of traditional switches and easily replace them.
Sensors have a significant advantage over mechanical counterparts in the form of a modern appearance. The flip side of the coin will be the higher cost of components. Remote control is the most comfortable, convenient, it is performed using conventional remotes.
Types of command signal transmission are different:
- radio signal
- infrared signal.
In the first case, the user will be able to make the necessary adjustments from anywhere in the building, premises, and even from outside. Which is convenient, effective, but components will cost more than when buying a remote control with an infrared signal.
The signal is able to transmit the necessary information only when pointing at the dimmer itself for incandescent lamps. And it will turn out to be performed only within the same room.

A simpler is the hinged option to assemble the dimmer. And the PCB is considered the most durable, which will prevent many types of early breakdowns.
Nevertheless, this feature is usually not considered a drawback, therefore, more affordable sets with an infrared signal are more popular. Acoustic is also a remote control method, but in this case you will have to purchase a sensor capable of picking up sound commands: clapping, music sounds and other similar noises.
Nevertheless, you should know that the latter option is more spectacular than effective. Since any third-party sounds, for example, the barking of a pet, a loud conversation will lead to an unauthorized change in the brightness of the glow of the lamps. This will not always please users.
At the same time, the acoustic sensor mounted in the design of the dimmer is able to make any party unforgettable, as it makes lighting devices respond to changes in the volume of music. That is, thus, it is quite possible to replace the light music.
In addition, you should be aware that control options using a computer with a wired or wireless connection, as well as a smartphone, tablet, which transmit the desired command signal via Wi-Fi, are becoming more popular.

Printed circuit boards are compact and durable compared to a hinged circuit. In addition, they are safer, which is important, since dimmers are used in rooms where people are
To be able to use any of the above methods, the design of the dimmer must be equipped with the necessary elements. Which makes it harder, therefore more expensive. As a result, the most popular management option is traditionally mechanical.
Type of device placement
Any modern dimmer can be accommodated in only three ways, and in everyday life a total of less is used - only 2. One option is rarely needed because of its structural complexity and performance.
Therefore, for housing or small commercial premises, the following types of accommodation are used:
- waybills;
- embedded.
In the first case, the traditional switch is replaced with a dimmer, in the second - it is installed out of sight, that is, it is mounted in a transfer case, a specially made niche. This means that in one situation, a person needs to take care of a control panel with high aesthetic qualities.
And in another, this nuance does not play any role. Since the appliance will be hidden from view. But you have to use only the remote control method. Overheads are mainly mechanical or electronic varieties.
The principle of the dimmer
The most effective way is to control the brightness using pulse width modulation. Since it is most suitable for modern energy-saving lamps.
The principle of operation in this case is the supply of current by short pulses, between which a long pause is maintained. Moreover, the greater its duration, the lower the brightness of the glow.

Connecting regulators is an important stage of assembly, since functionality and comfort depend on it, which is why people actually do such work
At the same time, the simplest devices are capable of changing the characteristics of light by a usual decrease / increase in the applied voltage. But this option will benefit only when using incandescent lamps.
In the case of using LED devices, only dimmable LED models will be able to work with the device, since conventional LEDs are not adjustable.
Hand made dimmer
Initially, you have to decide on a number of parameters, including power, type of placement, control. Without this procedure, a workable regulator can only be created by accident, which is rare.
Next, you need to purchase or obtain ownership in another way, a triac, dinistor, as well as a node that forms a control impulse, for example, to take from an unnecessary device.
In addition, you will need a capacitor and 2 resistors that can support the previously defined power. Moreover, one of them must be variable. This feature will allow you to change the voltage.

The diagram shows how the user can control one light source using two controllers installed in different parts of the room, which is convenient
And when its value reaches the maximum possible for the used dinistor, then it works and gives the necessary command impulse. Which goes to the triac, and then gets to the lamps or other electrical appliances.
When this power key opens, it depends on the position of the controls. Since it can be both 220 V, and 40 V, if it is necessary for a person.

Since craftsmen make mainly overhead dimmers, it is not difficult to install it in a circuit. Since this operation is no different from installing a traditional switch
All of the above structural elements are combined into one product according to the attached scheme using wires and soldering. Contacts must be carefully insulated. Since a short circuit is one of several common causes of electrical equipment failure.
Connecting the dimer to the circuit
This is no less important part of the work than the manufacture itself, since in many respects the durability of operation depends on the quality of the dimmer connection. In addition, the connection affects the convenience and comfort of control, so dimmers are usually divided according to this characteristic.
They are as follows:
- by type of switch - they replace traditional switches and regulate one lamp or their group, for example, a chandelier with a large number of lighting elements;
- walk-through - they allow you to control one electrical appliance, for example, an LED lamp, with the help of several regulators, for convenience located in different parts of the room, building.
In the first case, when using a network that includes 3 wires, zero and ground go to the lamp, another electrical appliance, and the phase to break. That is, the procedure is familiar to everyone who replaced conventional switches.

When checking the regulator, its installation and operation, a person should observe safety measures, since sufficient voltage passes through it to cause harm to health
When installing two pass-through dimmers from the junction box, three wires should be connected to each of them. This is a prerequisite. Then the first two pins are used to connect both controllers. To ensure reliability, use a jumper.
Another of the free contacts is connected to the phase, and the last to the lighting device. Then the connection is checked for operability.
During these operations, you should be aware of the observance of security measures - each of them can be performed only after the network is switched off.
The following article, fully devoted to this interesting topic, will familiarize you with the guidelines for choosing a dimmer for controlling LED strip.
The first video will allow you to quickly understand the manufacturing procedure:
The following video will allow you to get acquainted with the principle of operation of modern dimmers:
Any user who does not even have special skills will be able to figure out how to make a simple dimmer with his own hands. This is a very inexpensive and uncomplicated solution. The main thing is to select the elements of the required power and to connect them to each other in a quality manner.
At the same time, it will be necessary to give the product a decent appearance, which complicates the task. But for this purpose, you can use the case of industrial regulators, even used ones.
Want to talk about how to assemble a device for adjusting the intensity of lighting with your own hands? Have a desire to share technological subtleties or ask a question? Please write comments in the block below, share useful information, impressions and photos on the topic of the article.